

Blog
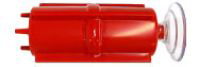
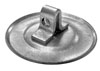
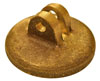
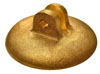
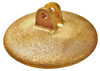
Manifold Primer
Posted by admin

-
INSTALLATION
- Mount the unit in position so that the float mechanism moves vertically and is at an elevation above the pump priming port.
- Use noncollapsible hose to connect the unit OUT port to the vacuum source, for example a tee fitting spliced into the vacuum line.
- Use noncollapsible hose to connect the unit IN port to the pump priming port, with the provided ball valve in between.
-
OPERATION
- Close the priming line ball valve.
- Close the pump discharge valve to prevent air being drawn through the discharge.
- Start the vacuum source.
- Open the priming line ball valve.
- When water enters unit, close priming line ball valve. (Water entering unit indicates pump is primed.)
- Start the pump and open the pump discharge valve.
- Stop the vacuum source then allow the water to drain from the unit
*NOTE: If water does not flow from discharge, turn your pump OFF and repeat steps 2 through 5. When pump is discharging properly the priming line may be disconnected from primer and the engine providing vacuum turned OFF.
-
MAINTENANCE
- Chamber housing should be kept clean in order to observe the float valve.
*If necessary, remove the unit and flush with water or a mild soap solution.
*Do not use any harsh cleanser or chemicals to clean the unit.- Use only soap and water to clean plastic parts.
- Do not tighten tie bolts or plastic dome more than necessary to provide seal.
- Keep the priming line ball valve closed when manifold primer/water trap not in use.
-
Manifold Primer – Parts
STANDARD PARTS PART# PART DESCRIPTION M1001 
Top Cover Assembly(See Lower Chart) M1002 Lower Cover M1003 Lower Housing M1004 Upper Housing M1005 Mounting Bracket (2 Req.) M1008 Float Assembly (See Upper Right Chart) M1010 Tie Bolt (3 Req.) M1012 Cork Gasket (3 Req.) M1014 Angle Valve (See Bottom Chart) TOP COVER ASSEMBLY – # M1001 PART# PART DESCRIPTION M1006 Top Cover Only M1007 Valve Stem Assembly M0051 Ball w/ Pin Assembly ANGLE VALVE ASSEMBLY – #M1014NEW PART# DESCRIPTION PART E0334 Brass Cock Valve X0E17 Close Nipple X0P67 ³/8″ Street Elbow FLOAT ASSEMBLY – #M1008 PART# PART DESCRIPTION M1009 Suction Cup M1013 Float Only BALL ASSEMBLY – #M0051 M1018 Rubber Ball X0M62 Cotter Pin VALVE STEM ASSEMBLY – #M1007 PART# PART DESCRIPTION M1011 Cork Seal Washer M1019 Stainless Steel Spring M1021 Stainless Steel Washer (2 Req.) M1022 Plunger Rod X0M61 Retainer Clip X0M63 ³/32 x 1″ Cotter Pin ACCESSORIES PART # DESCRIPTION X0D03 ¼-20″ Hex Nut (3 Req.)


Nov 25 2015
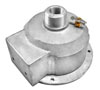
Power Primer
Posted by admin
-
INSTALLATION & OPERATION
- Mount the Power Primer securely to a plate on the engine or centrifugal pump.
- Primer should be high enough to allow water to drain back into pump suction line.
- Position the unit to provide easy access to lubricators, filters and mufflers.
- Install hand valve between the power primer and the volute of the pump.
- To start priming, open priming line valve and turn primer on.
- Watch for water to appear in water trap.
- When water appears in trap, turn pump OFF and CLOSE priming line.
-
MAINTENANCE
- Vacuum Pump requires occasional flushing. Remove pressure gauge and run 1/4 cup of flushing solvent (Gast AH 225 or equivalent) through pump.
- Brief warm-up may be required for pump to produce a vacuum.
- Perform initial inspection after 500 hours.
- Use engine oil with viscosity of SAE10 when refilling oiler.
- Clean or replace air filters as needed.
- Keep water trap clear of debris.
-
SAFETY & RECOMMENDATIONS
- Make sure that electrical connection is grounded.
- Do not operate primer without drive guard.
-
Power Primer Pump – Parts
STANDARD PARTS PART# PART DESCRIPTION E0333 Vacuum Gauge P0003 Vacuum Pump (See Chart Below) MP2000 Water Trap P0005 Galvanized Tee P0015 Lower Base (*Honda units will use part# P0013) P0018 Drive Coupling Guard P2019 ½” NPT Pipe Union X0P50 ½” MPT x ⅜” FPT
Steel Hex BushingX0P67 ⅜” NPT
Street ElbowADDITIONAL PARTS FOR PP35AC PART# PART DESCRIPTION P0011 8′ Electric Cord ADDITIONAL PARTS FOR PP35DC PART# PART DESCRIPTION P0020 Battery Disconnect Switch Lever, 12V, 100amp AVAILABLE MOTORS FOR PP SERIES PART# DESCRIPTION CURR. P5001 5.5 HP, Gas Engine w/ Gear Red., Honda N/A P5004 1 HP, 1 Phase AC P5004-1 1 HP, 3 Phase AC P5009 1 HP, 12 Volt DC Direct, 1750 RPM DC P5015 1 HP, 24 Volt DC PP35DC – MOTOR KIT PART# DESCRIPTION P0010 Pulley for 1065 Vacuum Pump 3-½ x ½ P0012-1 FHT Belt ½” x 30″ P5009 12 Volt DC Direct, 1HP, 1725 RPM


Nov 25 2015
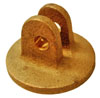
Hand Diaphragm Primer
Posted by admin
-
INSTALLATION & OPERATION OF HAND DIAPHRAGM PRIMER PUMP
- Attach mounting bracket to centrifugal pump or skid.
- Use non-collapsible hose or flexible tubing to connect primer suction inlet to pump.
- Install cut-off valve between the primer suction inlet and pump.
- Close cut-off valve immediately after priming.
- Make sure primer drain valve is closed.
- A cut-off valve should be used at the pump discharge to prevent air from being drawn through the discharge line while priming.
-
MAINTENANCE
- Remove any debris under the diaphragm after each use.
- Clear all fluids from inside the unit after each use.
-
TROUBLESHOOTING
If DP is not priming the pump, check the following: - Make sure drain cock is closed.
- Inspect check valve for blockage and free movement.
- Check suction side for air leaks.
- Call Protek Technical Support for additional help.
-
Hand Diaphragm Primer – Parts
DP5 DP7 DP9 Description D0055 D0087 D0062 Lower Housing D0056 D0088 D0063 Upper Housing D0054 D0058 D0061 Diaphragm D0107 D0104 Mounting Bracket D0303 Diaphragm Plate (2 Req’d) D0003 1-½” Locknut D0127-A D0127-A D0127-A Connecting Rod Assembly D0050 D0050 D0051 Fulcrum Eyebolt D0004 D0004 D0004 Check Valve D0340 D0340 D0340 Drain Cock D0347A D0347A D0347A Fast Pin Assembly (2 Req’d) X0D01 X0D01 X0D01 Thumb Screw HANDLE ASSEMBLY – #D0047 HANDLE W/ GRIP ASSEMBLY – #D0095 PART # DESCRIPTION PART # DESCRIPTION D0093 Handle Bracket (Includes 2 Fast Pins & Thumb Screws) D0094 Grip D0095 Handle w/ Grip Assembly (See Right) D0094-5 Handle (Pipe) OLD STYLE PARTS (Available Upon Request) OLD STYLE DP5 & DP7 OLD STYLE DP9 PART# PART DESCRIPTION PART# PART DESCRIPTION D0339 Ball Check Valve D0001 Fulcrum Bracket (Old DP9) D0300 Valve Bushing D0129 Fulcrum Link (2 Req’d) Optional REPAIR KITS
#D05RK (DP5), D07RK (DP7), D09RK (DP9)PART# DESCRIPTION PART# DESCRIPTION D0004 Check Valve (Disk) X0D04 ¼”-20 x 1″ Bolt
(4 Req’d)D0054, D0058, D0061 Diaphragm X0D08 ³/8″ Internal Tooth Lock Washer D0303(DP5 only) Diaphragm Plate X0D09 ¼” Split Lock Washer
(4 Re’q)D0340 Drain Cock X0D10 ³/8″ Flat Washer X0D03 ¼”-20 Hex Nut (4 Re’q) X0D11 ³/8″-16 Hex Nut
(2 Req’d)


Nov 25 2015

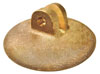
Exhaust Primer
Posted by admin
Normal speeds for small engines are usually higher than for large engines, therefore primers may be generally classified in four groups as follows:
-
INSTALLATION & OPERATION
- Use adapter to attach ejector to engine exhaust stack.
- Pump discharge must be closed while priming. This can be done by installing a discharge check valve or hand operated gate valve.
- Install vacuum gauge and priming valve on priming line, between the valve and ejector.
- After priming is completed, lay handle and brass cap 180 degrees from priming position to allow exhaust to escape.
*NOTE: Vacuum gauge should indicate priming rate of 18-22 Hg.
-
MAINTENANCE
- Before every use, check the unit for accumulated build-up of dirt or soot from the engine exhaust.
- If vacuum gauge is not working, replace before using EP.
-
SAFETY & RECOMMENDATIONS
- EPs will not work effectively on single cylinder or two cycle (two strokes) engines.
- Installing a Tachometer on the engine to determine exact speed is useful.
- Line air leaks may prevent priming.
- EPs can be used on turbo engines, provided that the RPMs are kept between 1100 and 1200.
- This information is set forth in general terms for the benefit of distributors, but it is advisable that distributors provide appropriate instruction to their customers.
-
Exhaust Primer – Parts
STANDARD PARTS PART# DESCRIPTION *Ejector (See chart on right for part numbers) *Exhaust Valve (See chart on right for part numbers) *Adapter (See chart below for part numbers) E0008 ³/8 X ³/8 X ¼
Priming TeeE0022 Clamp E0323 Handle for Brass & Steel Caps E0333 Vacuum Gauge E0334 ⅜” FPT
Brass Cock ValveX0E17 ⅜” NPT x 1”
Close NippleEJECTORS PART# DESCRIPTION E0090 60/90 Ejector E0091 150/225 Ejector E0092 250/300 Ejector E0093 350/500 Ejector ACCESSORIES PART# DESCRIPTION X0D03 Hex Nut/td> X0D04 ¼ -20 x 1″ Bolt X0D09 ¼ ” Split Lockwasher X0E12 10-24 x ½ ” Machine Screw (60/90 only) X0T27 ¼ #18 Internal Tooth Lockwasher EJECTORS PARTS Venturi Gasket Nozzle Tip Nozzle Base 60/90 E1379E0315E1369M150/225 E2715E2315-AE2315250/300 E2925E2315-BE2315350/500 E1384E0141E3940CADAPTERS PART# DESCRIPTION E0000 1″ Adapter E0001 1 ¼” Adapter E0002 1 ½” Adapter E0003 2″ Adapter E0004 2 ½” Adapter E0005 3″ Adapter E0006 3 ½” Adapter E0007 4″ Adapter EXHAUST VALVES PART# DESCRIPTION E0014 1 ¾” Brass E0317 2 ¼” Brass E0318 2 ¾” Steel E0015 2 5/8″ Brass E0016 3 ¼” Brass E0017 4 ¹/16″ Brass E0018 5″ Brass


 E1379
E1379 E0315
E0315 E1369M
 E2715
E2715 E2315-A
 E2315
E2315 E2315-B
 E1384
E1384 E0141
E0141 E3940C
Nov 19 2015